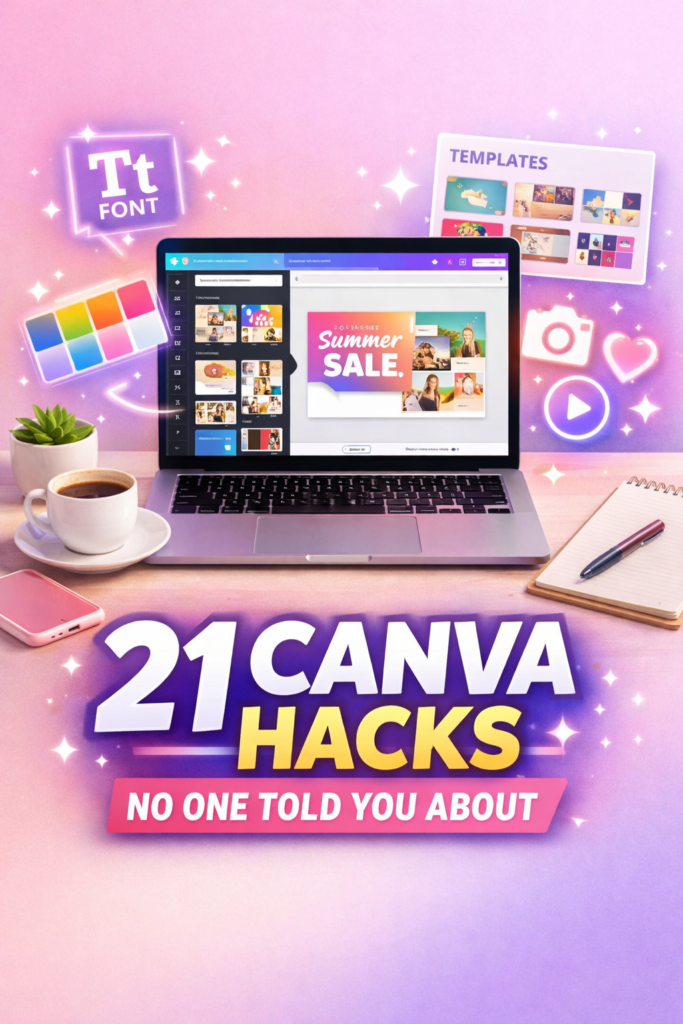
21 Canva Hacks No One Told You About
(But Every Creator Should Know)
Canva has quietly become the world’s most-used design tool — and for good reason. It’s fast, intuitive, and powerful enough for everything from Instagram carousels to full-blown pitch decks. But here’s the thing: most people are only scratching the surface. Beneath those drag-and-drop templates lies a treasure chest of features, shortcuts, and workflows that can turn a decent design into a jaw-dropping one — in half the time.
Whether you’re a social media manager, a small business owner, a blogger, or a full-time content creator, these 21 Canva hacks will change the way you design. Let’s dive in.
⚡ Speed & Workflow Hacks
1. Use Keyboard Shortcuts Like a Pro
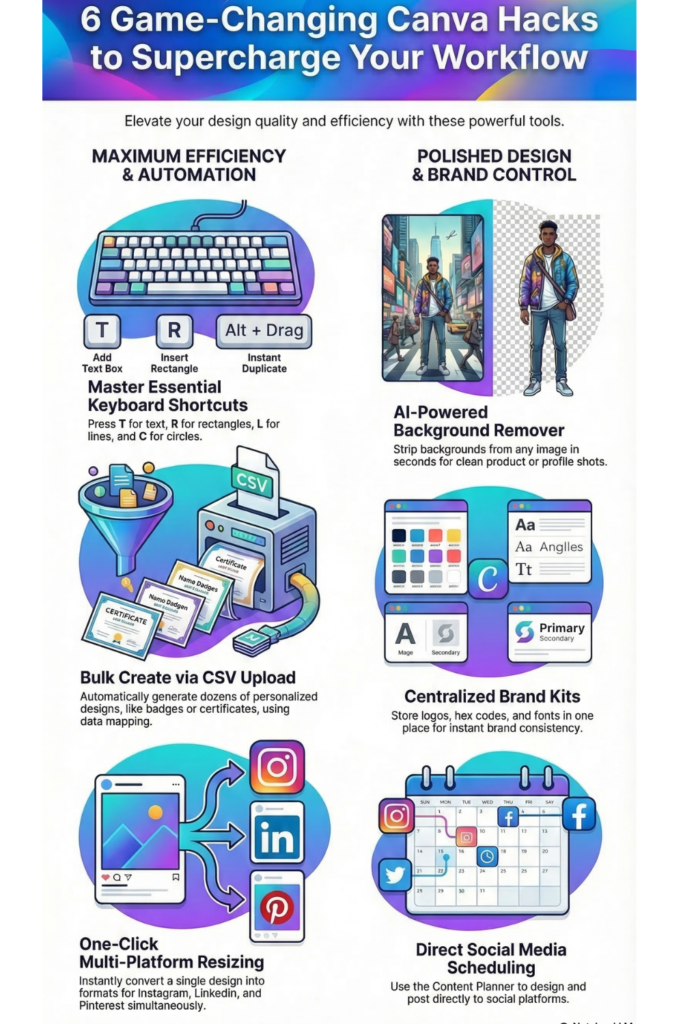
Canva has a full library of keyboard shortcuts most users never discover. Press T to instantly add a text box, R to drop in a rectangle, L for a line, and C for a circle. Hold Alt and drag an element to duplicate it instantly. Press Ctrl+G (Cmd+G on Mac) to group elements. These micro-shortcuts add up to saving hours every week.
2. The Magic of “Copy Style”
Right-click any text or element and select “Copy Style,” then right-click another element and choose “Paste Style.” This is Canva’s version of the Format Painter — it transfers font, color, size, and effects in one click. Use it to maintain brand consistency across pages without manually matching every property.
3. Bulk Create with the Magic Generate Feature
Need 50 personalized certificates or name badges? Use Canva’s Bulk Create feature (found under Apps). Upload a CSV with your data, map the columns to your design fields, and Canva will generate all 50 designs automatically. This is a game-changer for event planners, educators, and anyone doing batch content creation.
4. Resize for Every Platform in One Click
Designed a post for Instagram but need it for LinkedIn, Facebook, and Pinterest too? Hit “Resize” (a Canva Pro feature), select all the platforms you need, and Canva will generate resized versions of your design instantly. You’ll still want to fine-tune, but 80% of the work is done for you.
5. Lock Elements to Prevent Accidental Edits
Right-click any element and select “Lock” to pin it in place. This is perfect for background images or logo placements — you’ll never accidentally drag your background when clicking another element again. It’s a tiny feature with massive practical value.
🎨 Design Quality Hacks
6. Use the Color Palette Generator
Upload any image to Canva’s free Color Palette Generator (available on the website) and it will extract a harmonious 5-color palette from that image. This is brilliant for creating branded designs that match a photo, a product, or even your client’s logo. You can then add those hex codes directly to your Brand Kit.
7. Blend Images Seamlessly with Transparency + Gradients
Place a gradient rectangle over a photo and reduce its transparency to create silky blended effects. You can also use the “Duotone” filter under image effects to give photos a bold editorial feel. Combine these two tricks to create eye-catching hero graphics that look professionally designed.
8. The “Ungroup” Template Trick
When you drop a template onto your canvas, everything is grouped. Most people edit at the surface level. Instead, click on the template and press Ctrl+Shift+G (or Cmd+Shift+G) to fully ungroup every element. This frees every individual shape, icon, and text block for complete customization — no more being boxed in by the template’s original structure.
9. Add Depth with Drop Shadows and Glows
Select any element, go to “Effects,” and explore the Shadows panel. You can customize the blur, direction, color, and offset of shadows to create stunning depth effects. A soft white glow around text on a dark background instantly creates a professional magazine aesthetic. These effects separate beginner designs from polished ones.
10. Use Grids for Perfect Layouts
Search for “Grid” in the Elements panel and you’ll find a library of image grid layouts — perfect for Instagram collages, mood boards, and media kits. Drag your photos directly into each grid cell and Canva auto-crops them. You’ll never need to manually align multiple photos again.
✍️ Text & Typography Hacks
11. Curve Your Text
Click on any text box, go to “Effects,” and select “Curve.” Use the slider to bend your text into arcs or circles. This is perfect for badges, logos, t-shirt designs, and watermarks. Combine curved text with a circle shape for a professional stamp-like branding element.
12. Mix Fonts Within a Single Text Box
You don’t need separate text boxes to use multiple fonts. Highlight specific words within a text box and change their font, size, color, or weight independently. This lets you create headline treatments like using a bold serif for the key word and a light sans-serif for the rest — all within one neat text container.
13. Use “Text to Image” for Custom AI Graphics
Canva’s built-in AI image generator (found under Apps > Text to Image) lets you create custom illustrations, photos, and artwork with a text prompt. Instead of hunting for stock photos that are never quite right, describe exactly what you need. The results are usable, fast, and free within your Canva plan’s monthly allowance.
14. Animate Individual Text Elements
Rather than animating the whole page, click a specific text or image element and hit “Animate” in the toolbar. You can apply entrance, exit, and looping animations to individual elements independently. This gives you precise control for creating dynamic social media videos and presentations that don’t feel like cookie-cutter slideshows.
📁 Organisation & Collaboration Hacks
15. Build a Brand Kit for Instant Consistency
In Canva Pro, your Brand Kit stores your logo, fonts, and brand colors in one place. Every new design you create will have your brand colors in the color picker and your brand fonts at the top of the font list. If you manage multiple clients or brands, you can create separate Brand Kits for each — no more copy-pasting hex codes.
16. Use Folders to Organize Your Designs
The longer you use Canva, the messier your “All Projects” tab becomes. Create folders for each client, campaign, or content type and drag designs into them. You can even share entire folders with team members or clients, giving them view-only or edit access to exactly the projects relevant to them.
17. Comment Directly on Designs for Feedback
When sharing a design for review, enable commenting. Collaborators can click anywhere on the canvas and leave pinned comments — like sticky notes attached to specific elements. This eliminates confusing email feedback like “make the blue thing bigger” because reviewers can point directly to what they mean.
18. Save Your Own Elements as “Templates”
Create a design you love — a social post layout, a quote card style, a banner format — and save it as a template in your Brand Kit. Next time you need a similar design, open the template and just swap the content. For content creators posting daily, this can reduce production time from 20 minutes to under 5.
🚀 Hidden Power Features
19. Use “Present and Record” to Create Videos Without a Camera
Canva has a built-in screen recorder that overlays your face (via webcam) onto your presentation. Hit “Present” then “Present and Record” to create a narrated walkthrough of any design or deck. You can export it as a video file — a powerful tool for client presentations, tutorials, and course content, all without any video editing software.
20. Remove Backgrounds on Any Image
Click on any image, select “Edit Image,” and choose “Background Remover.” Canva’s AI-powered tool strips the background in seconds with impressive accuracy — perfect for product shots, profile photos, and sticker-style graphics. You can also use the eraser brush to manually clean up edges if the automatic cut isn’t perfect.
21. Schedule Social Media Posts Directly from Canva
You don’t need a separate scheduling tool for basic social posting. Canva’s Content Planner (under the “Publish” menu) lets you schedule posts directly to Instagram, Facebook, LinkedIn, Twitter/X, Pinterest, and more — right from within the design. Design it, write the caption, pick a time, and hit schedule. It turns Canva into a lightweight all-in-one content studio.
Final Thoughts
Canva is one of those tools where most users hit a comfortable plateau and stop exploring. But as you’ve just seen, the platform is hiding a remarkable number of features that can fundamentally change how fast you work and how polished your output looks.
You don’t have to implement all 21 of these hacks at once. Pick three that immediately solve a problem you have right now — maybe it’s the Background Remover, the Bulk Create feature, or the Resize tool — and start there. Once they become second nature, layer in more.
The creators who produce the most consistent, high-quality content aren’t necessarily the most talented designers. They’re the ones who’ve learned to make their tools do the heavy lifting. Now you have the hacks to do the same.
— Happy designing! 🎨