How to Create a Digital Planner in Canva and Sell It in 2026
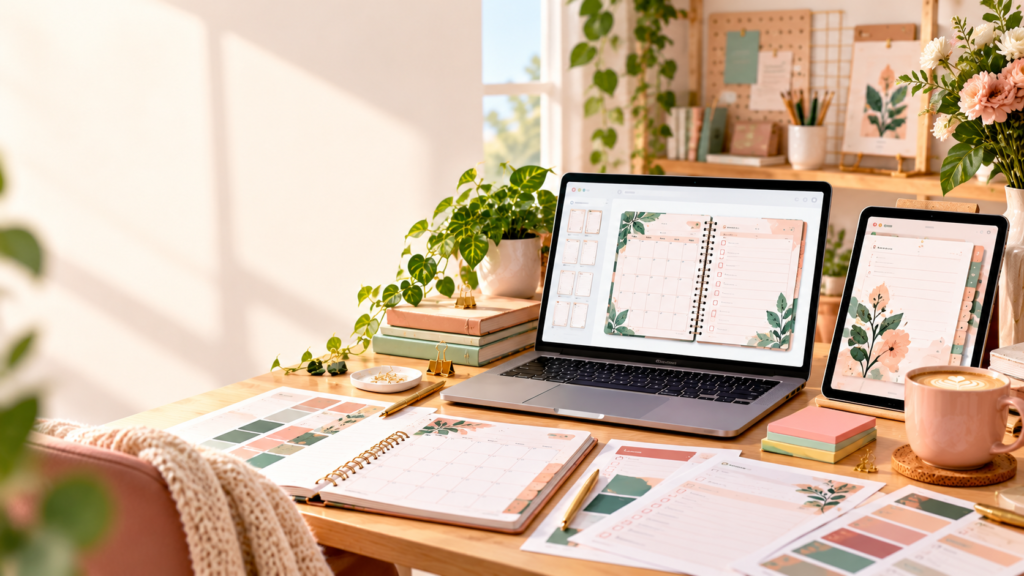
Inspire & Ink
Introduction
A digital planner is a structured set of pages for organizing a specific part of life or work, such as daily tasks, a budget, a wedding, or a content calendar. Creators use Canva to design them because it handles layout, typography, and PDF export without needing professional design software.
If you want to know how to create a digital planner in Canva, the design is the easy part. A planner that sells needs to be useful to a specific person, well made, honestly presented, and put in front of the right buyers. This guide covers the full process: planning, designing, exporting, packaging, listing, and promoting.
One note before we start: Canva’s interface, plans, and licensing rules change, as do marketplace policies. Where details matter, check the official documentation linked at the end of this article before publishing or selling anything.
What Is a Digital Planner?
The term covers several different products, and buyers often confuse them. Being precise protects you from refunds and bad reviews.
- Printable planners are PDFs designed to be printed on paper. They usually come in standard sizes such as US Letter or A4, and sometimes in sizes like A5 or Half Letter.
- Digital planners (tablet planners) are used on-screen with a stylus in a note-taking app such as GoodNotes or Notability. They are often built with clickable navigation.
- PDF planners are simply planners delivered as PDF files. A PDF is a file format, not a feature, so not every PDF planner is hyperlinked or interactive.
- Hyperlinked digital planners include clickable tabs or buttons that jump between pages, such as from a monthly view to a specific week.
- Canva planner templates give buyers an editable Canva design they can customize themselves.
Planner types you could create include:
- Daily planner
- Weekly planner
- Budget planner
- Student planner
- Fitness planner
- Meal planner
- Wedding planner
- Business planner
- Content calendar
- Freelancer planner
What You Need Before Starting
- A Canva account. A free account is enough to start designing, but some features, elements, and export options may require a paid plan. Check Canva’s current plan comparison before relying on any feature.
- A planner idea that solves a specific problem.
- A target audience you can describe in a sentence.
- A page-size decision. For example, US Letter or A4 for printables, or a tablet-friendly landscape or portrait size for a digital planner.
- A color palette and typography. Two or three main colors and one or two readable fonts is plenty.
- A product testing checklist. You’ll build this as you go (see Step 7).
Step 1: Choose a Specific Planner Niche
A generic “daily planner” competes with thousands of similar products and gives buyers no particular reason to choose yours. A planner built for one audience can be more useful because every page reflects that person’s real needs.
Examples of specific niches:
- Budget planner for freelancers (irregular income, quarterly tax reminders, invoice tracking)
- Student assignment planner (deadlines, exam countdowns, study blocks)
- Content planner for bloggers (post pipeline, keyword notes, publishing schedule)
- Wedding planner for couples (vendor tracking, guest list, timeline)
- Weekly planner for busy parents (school schedules, meal planning, family appointments)
- Small-business expense planner (monthly expense logs, receipts checklist)
You can use an AI assistant to brainstorm. Try this prompt:
“Suggest 10 digital planner ideas for [TARGET AUDIENCE]. For each idea, identify a specific problem, useful planner pages, potential buyers, and ways to make the product more helpful than a generic planner. Do not invent demand statistics.”
Treat the output as a starting list, not proof of demand. That comes from research.
Step 2: Research the Market
Before designing anything, look at what buyers already see and say.
- Etsy listings: Search your niche and note what’s offered, how listings are presented, and which features are highlighted.
- Pinterest search suggestions: Autocomplete shows how people phrase planner-related searches.
- Google search results: See which articles, shops, and products appear, and what questions come up.
- Customer reviews: Read what buyers praise and, more importantly, what they complain about.
- Competitor product features: Note page types, formats, and bonuses.
- Common complaints and gaps: Missing instructions, cluttered layouts, no printing guidance, and broken links are all opportunities.
Use research to find openings, not to copy another seller’s design or content. Competitors also don’t automatically mean a niche is a bad one. They can show that people are looking for that kind of product. Your goal is to offer something clearer, more useful, or better suited to a particular audience.
Step 3: Plan the Planner Pages
Sketch the page list before opening Canva. Here’s an example for a weekly planner:
- Cover
- Yearly overview
- Monthly calendar
- Weekly schedule
- Daily priorities
- Task list
- Notes
- Habit tracker
- Goal tracker
- Weekly review
You don’t need all of these. Choose only the pages that support your audience. A freelancer budget planner might need an income tracker, an invoice log, and a quarterly review, but not a habit tracker. Fewer, better pages beat a long planner padded with filler. Also decide how many copies of each page type you need (for instance, 12 monthly pages or 52 weekly pages).
Step 4: Design the Planner in Canva
Here is a beginner-friendly workflow:
- Open Canva and start a new design.
- Choose a page size or custom dimensions that match your planner type.
- Select a consistent color palette and stick to it.
- Choose readable fonts. A clear body font plus one heading font is usually enough.
- Create the cover. Keep it simple and clearly titled.
- Design the main planner page, such as the weekly spread. Get this one right first.
- Duplicate and customize pages so the structure stays consistent.
- Add useful headings, writing areas, and page numbers.
- Maintain consistent spacing and margins across every page. If you’re making a printable, leave enough margin that content isn’t cut off.
- Review every page at full size, not just in thumbnail view.
Canva’s menus and features move around over time, so if a tool isn’t where you expect it, check Canva’s Help Center rather than guessing.
Step 5: Make the Planner Useful and Original
A pretty planner that’s awkward to use won’t earn good reviews. Focus on:
- Clear writing areas big enough to actually write in.
- Readable typography at the size it’ll be used. Tiny script fonts look nice in a mockup and are hard to read in practice.
- Consistent visual hierarchy: titles, section headings, and labels should look the same on every page.
- Appropriate contrast between text and background.
- Useful layouts that match how people really plan.
- Original design choices. Build your own layouts, combinations, and style rather than reproducing another seller’s.
- Restraint with decoration. Every element should earn its place.
Example of improving a crowded page: Imagine a weekly page with seven narrow day boxes, a decorative border, a quote, a habit tracker, a mini calendar, and a notes box all squeezed together. To fix it, remove the quote and border, move the habit tracker to its own page, shrink the mini calendar into the header, and give the day boxes the space they need. The page will feel calmer and be far easier to write on.
Step 6: Add Hyperlinks if Needed
A printable PDF works on paper, so clickable links are unnecessary. A tablet planner with clickable tabs relies on navigation: tapping “March” jumps to the March page.
If you want navigation, Canva’s current workflow may let you link text or elements to specific pages in your design, and you can then export a PDF that preserves those links. Confirm the exact steps and export settings in Canva’s documentation, because they can change.
Then test every hyperlink in the exported file, not just in Canva. Open the PDF in the app buyers will likely use and tap through each tab and button. Don’t describe a planner as “hyperlinked” or “interactive” unless you’ve added those features and confirmed they work.
Step 7: Export and Test the Planner
Build your checklist around these points:
- PDF format: Choose the export option that suits the product. Printables generally call for print-quality output, while tablet planners may prioritize preserved links and manageable file size.
- Page size and margins: Confirm dimensions are correct and nothing sits too close to the edge.
- Fonts and graphics: Check that everything renders properly and images look sharp.
- Hyperlinks: Test each one if the product is advertised as clickable.
- Printing: For printables, print at least one sample page and check size, legibility, and margins.
- Device testing: Open the file on a computer and, if relevant, a tablet.
- File size and readability: Very large files can be slow to download and open on some devices.
Printable and tablet-based planners need different testing. A printable should be tested on paper, while a tablet planner should be tested with a stylus-friendly app.
Step 8: Create Product Mockups
Mockups are often the first thing a buyer sees. Good ones show:
- The cover
- Sample pages
- Key features
- Page count (only if accurate)
- Included file formats
- Whether it’s for printing, digital use, or both
Canva can handle mockups, and you can also use other image-editing tools. The rule that matters most: a mockup must never misrepresent what the buyer receives. Don’t show a physical bound planner if you’re selling a PDF, and don’t imply features (such as links or editable fields) that the product lacks.
Step 9: Package the Digital Planner
Prepare everything the buyer needs in a tidy bundle:
- The final planner PDF
- Separate printable files, if included
- A short instructions page or PDF explaining how to open and use it
- Printing recommendations (paper size, scaling settings)
- Compatibility notes (apps and devices you’ve tested)
- License or usage terms (personal use only, no resale, and so on)
- Customer support information
If you’re selling a Canva template, you’ll typically deliver a template access link along with clear instructions on how to use it. Canva’s rules on selling templates, and on which elements can be included, are specific, so review the current licensing terms first.
Step 10: Choose Where to Sell
| Platform | Suitable product types | Main advantage | Important consideration |
|---|---|---|---|
| Etsy | Eligible digital downloads, printables, and planners | Built-in marketplace shoppers searching for planners | Competitive; you’ll need to follow Etsy’s digital product and seller policies |
| Gumroad | Digital downloads and direct-to-customer products | Simple way to sell your own products to your own audience | You’re mainly responsible for bringing traffic |
| Shopify | Branded stores with multiple product lines | Full control over branding and store design | More setup and costs to manage; also requires your own traffic |
| Personal website | Planners alongside blog content and email marketing | Connects content, audience, and sales on a platform you control | Requires building and maintaining your own infrastructure and SEO |
The right choice depends on your product, audience, fees, and marketing plan. Fees, requirements, and policies change, so verify current details on each platform’s official pages before you decide.
Step 11: Price Your Digital Planner
Factors that influence price:
- Product usefulness
- Number and quality of pages
- Interactive features
- Originality
- Target audience
- Comparable products
- Bonuses
- Platform fees
For illustration only, a simple single-purpose printable might sit at a lower price point than a large hyperlinked planner with bonuses. These are not recommendations or predictions. Real pricing requires looking at comparable products in your niche. Don’t assume any price will produce sales, and don’t treat any figure as an earnings promise.
Step 12: Write a Product Listing With AI
An AI assistant can help you draft a listing. Use a prompt like this:
“Write a clear and honest product description for a digital planner designed for [TARGET AUDIENCE]. Explain the problem it helps with, the pages included, file formats, how to use it, compatibility, and what the buyer receives. Do not make unsupported claims. Use natural language and avoid keyword stuffing.”
You are responsible for every statement in the final listing. Verify page counts, file formats, compatibility, and features against the actual product, and edit the draft so it sounds like you.
Step 13: Promote the Planner With Pinterest and SEO
One planner can fuel several promotional assets without repeating identical content:
- Pinterest pins: Show different pages or use cases, each with a distinct headline.
- Blog posts: Write helpful articles such as “How to plan your freelance finances” that naturally feature the planner.
- Instagram carousels: Walk through a use case page by page.
- Facebook posts: Share tips and a behind-the-scenes look at the process.
- Short-form video scripts: Demonstrate filling in a page.
- Email newsletters: Offer a free sample page or tip, then introduce the full planner.
Pinterest pins should link to the relevant product page or to a genuinely useful article, not just the homepage. Promotion works best when it’s helpful first and sales-oriented second.
Common Mistakes to Avoid
- Choosing a niche without research
- Copying competitor designs
- Making pages too decorative or crowded
- Using unreadable fonts
- Exporting without testing
- Selling a printable PDF as if it were a hyperlinked planner
- Using unlicensed graphics
- Using misleading product mockups
- Ignoring customer feedback
- Expecting instant sales
Canva Licensing and Marketplace Rules
This isn’t legal advice, but responsible sellers should:
- Check current Canva content licensing terms before selling anything.
- Verify that assets can be used in your intended product format. Rules can differ between a finished PDF and an editable template.
- Avoid redistributing standalone stock assets.
- Review marketplace policies for digital products on every platform you use.
- Follow applicable copyright and trademark rules.
- Make accurate claims about AI-assisted content where a platform requires disclosure.
Official policies change, so confirm the current wording before you publish.
Frequently Asked Questions
1. Can I create a digital planner in Canva for free? You can start designing with a free Canva account. However, some elements, features, or export options may require a paid plan, so check Canva’s current plan details.
2. How do I create a digital planner to sell? Choose a specific niche, research the market, plan the pages, design in Canva, export and test the file, create mockups, package the files, then list and promote it.
3. Can I sell planners made with Canva? Often yes, but it depends on which assets you used and how you deliver the product. Review Canva’s current content license terms before selling.
4. Can I sell digital planners on Etsy? Etsy allows eligible digital downloads, but you must follow its seller and digital product policies, including any rules on AI-assisted content. Check Etsy’s current policies.
5. Can I sell digital planners on Gumroad? Gumroad is built for selling digital products directly, so planners generally fit. Review its current terms and fee structure.
6. What is the difference between a printable planner and a digital planner? A printable is designed to be printed and written on paper. A digital planner is used on a screen, typically with a stylus in a note-taking app, and often includes clickable navigation.
7. How do I make a hyperlinked digital planner? Add links between pages in your design, export a PDF that preserves them, and test every link in the exported file. Check Canva’s current documentation for the exact steps.
8. What file format should I use for a digital planner? PDF is the most common format for both printables and tablet planners. Template products use a Canva template link instead.
9. How do I price a Canva digital planner? Compare similar products and consider page count, features, originality, bonuses, and platform fees. There’s no universal price.
10. Do I need an iPad to create a digital planner? No. You can design in Canva on a computer. An iPad or other tablet is useful for testing how it works with a stylus, but it isn’t required to create the file.
Conclusion
The process is straightforward: choose a specific audience, research demand, plan useful pages, design in Canva, test and export, create honest mockups, package the files, publish the listing, promote the product, and improve it based on feedback.
Start with one well-designed planner for a clearly defined audience rather than producing many generic products without validating demand. Sales are never guaranteed, but a useful, honest, well-presented product gives you the best foundation.